How to create your first layout with program MyMemoriesSuite (Part 1)

First screen. Click on the word Create:

You get to the second screen. Click on Design.

Click on Photobooks.

Select 12" x 12" (this is the size of the papers in kits).

You are ready to begin!

On the left side, choose the way you'll want to place your pictures. I chose 3 pictures side by side:
Double-click on it. You get the following result:

Of course, you'll be able to change them later. But for the first layout, we'll keep them there. We will now open the folder where the kit you want to use is. For this example, I chose my kit St. Patrick's Day.
Each parts of the kit are in different folders:

- Click first on backgrounds gallery icon. Browse to find the folder with the background papers you want to use, select it and select folder.
- Do the same for embellishments.
- Do the same for the pictures you want to use. If you range your pictures in folders on your hard disk, it'll be easier for you to find them back.

Click on the folder in which your photos are and then on button Select Folder. On the left of the screen, you see the picture:

Your environment is now ready. You have the background papers, the embellishments and the pictures.
Let's begin to work now!
- Click on the background button and select the background paper you want to use.
- I choose Paper 3
- Click on the embellishment button and select the element you want to add to your layout.
- I double click on element 10

- I have to make a rotation, because I need it to be horizontal. Click on button (on the right part of the screen):


When you place your mouse over one element of the layout, the cursor's form changes.
- Click on the element, drag and drop to move it where you want. Place it above pictures:

- Double click on element 8 in the list of elements (on the left side):

It's placed in the middle of the layout.
- Drag and drop it down and on the left side:

- Double click on element 9 in the list of elements (on the left side).
- Drag and drop it down and on the right side of the layout.

It's also too big. We have to reduce it's size.
All around an element, there are little squares. The ones on the corners can be used to change the size.

- Put the mouse over the square (with a circle on my picture) and drag inside to reduce the size.
You should get this (after replacing the element on the right place(drag and drop)):

MyMemories Suite respects the proportions of the picture, which is really great!
We'll now add 2 flowers and one ribbon to the layout.
- Use the lateral bar to go down and see the other embellishments of the kit.

- Add 2 flowers. (double-click on them to add them)
- Use the lateral bar to find a ribbon and add it too.
- Change the size of the flowers and place the elements as on the picture below.

I want the ribbon to be under the other elements!
We'll have to change the order of the elements.
- Right-click on the ribbon. A menu appears.

- Select Send to Back. It's placed differently on the background paper. If you select Send Backward, it'll be placed under the first flower, and you'll have to repeat it until it's placed on the background paper. It can sometimes be very useful.
- The same way, Send element 9 to front.

It's now more than time to save your work.
- Click on Menu File and choose Save or CTRL + S on the keyboard.

- Give a name to your album. It'll be saved in your folder named My Memories Suite Albums.
-I give the name Say it with Flowers.
The name of the album is now shown in the menu bar instead of Album 1.

What shall we do next time?
- Add shadow to our elements
- Add a text on the tag
- Add pictures, with a frame and some shadow.
- Add some decoration on the background/
Come back April 20th for the second part of this lesson.
Featured Products in this Lesson
All at 25% new-release discount.

You can find it here.
It is coordinated o the collection: Say it with Flowers.


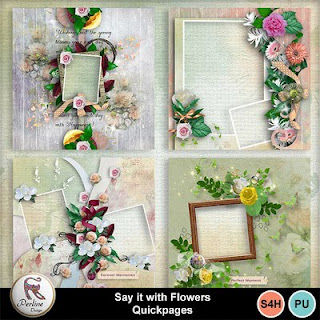

And a template album with only 4 pages, but I added more papers and elements.
8 papers and 55 elements
To use with My Memories Suite 9.

Commentaires
Enregistrer un commentaire